Creating a React.js driven web page
This is the second post in the series.
React.js has been successfully added to out Asp.Net MVC web app in part 1.
I will now demonstrate the usage of React.js with a simple user maintenance screen, displaying a list of existing users that can be edited individually.
Displaying data in a React component
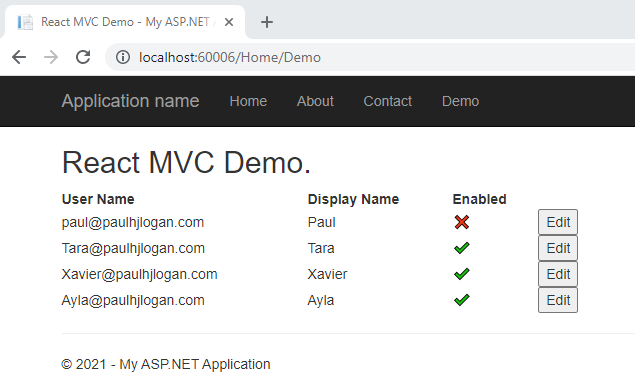
Here is our user listing page:
|
|
A couple of noteworthy points:
- Note that the js file reference for reactDemo.js highlighted above refers to the compiled js file that Babel creates in the Scripts folder. If you come across the following error in the console, then you could well be pointing the web page to the pre-compiled jsx file:
- The reactDemo.js script tag has a type of module - this is necessary because I will be using the imports statement within that js file, and they can only be used inside modules.
I use the global fetch() method of the javscript Fetch API to start the process of fetching the list of users from the network (my server side MVC controller action). The method returns a promise that is fulfilled once the response is available.
I extract the JSON body content from the promise’s resolved response object, then call React’s DOM render() method to render the React user summary component into the DOM, passing in the JSON array of users as a parameter.
This top-level API is available from the ReactDOM global, because I am loading React from a <script> tag.
Finally, I display user summary container, which shows the populated table of users.
|
|
Editing form data in a React component
Here is the screen shown after clicking the Edit button for a user:
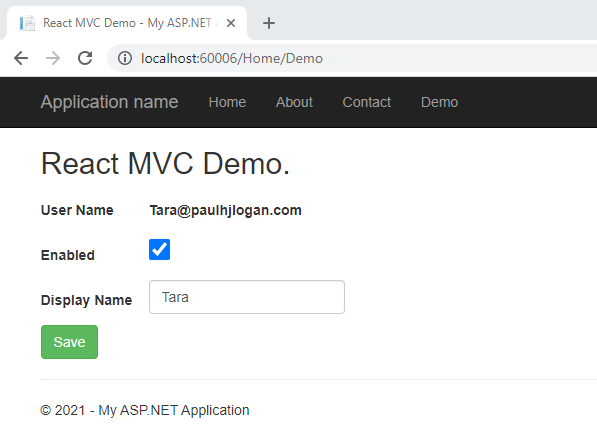
The Edit button is wired up to call the EditUser function when clicked. This function will retrieve the user from the user list and pass it into our next React component for editing the user details, hiding the user summary component as well.
|
|
The User editing React component is shown below. I extract the user details from the props parameter passed in. I then pass these details as the initial state to the useState hook, which returns the current state and a function that updates it. These returns are assigned to variables using destructuring assignment syntax.
Handlers are added for input changes and form submission, and finally the component is rendered with the return JSX.
|
|
The data-binding magic is provided by React.js’ Controlled Components. A controlled component is created by binding the input value to the state variable (named values above), and an onChange event to change the state as the input value changes - in this case, the setValues function in the handleInputChange and handleCheckBoxChange handlers.
Submitting form data from a React component
Regards,
Paul.